DIY Home Décor
Transform Spaces with Reclaimed Wood Wall Decor: Practical Steps and Inspiration
Learn how to create unique reclaimed wood wall decor in any space. Step-by-step sourcing, prepping, and styling tips for authentic, durable, and eco-friendly walls you’ll be proud to show off.
Advertisement
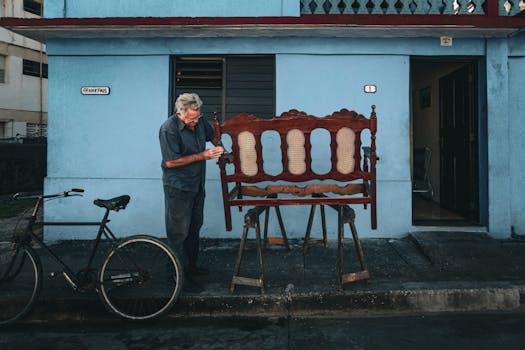
Old barn wood or shipping pallets can become the high point of any room. That’s the magic of reclaimed wood wall decor: giving history a new home while making a design statement.
Using reclaimed wood as decor isn’t just a creative outlet. It’s a practical, eco-friendly way to create warmth, character, and personality in your living or work spaces.
If you’re curious about affordable style upgrades, you’ll find hands-on advice here. Let’s dig into sourcing, prepping, and designing your own reclaimed wood wall decor project—no special skills required, just motivation and care.
Finding Quality Reclaimed Wood: Sourcing Without Surprises
Securing quality reclaimed wood sets your project up for success. Expect to track down boards in places that rarely advertise. Hidden gems need digging, but the reward is authentic charm and durability.
Choosing the right source can mean the difference between endlessly sanding dirty scrap and finding pieces that are ready for a gentle clean. Knowing where and when to look is crucial if you want finished results worth displaying.
Thrift Stores and Salvage Yards: Treasure Hunt Mindset
Treat each visit like a treasure hunt. Look for stacked wood, not surface-level displays. Reclaimed wood wall decor projects thrive on these overlooked finds with weathering, nail holes, and historic paint.
Chat with staff—as real estate changes hands, salvage yards often get one-time loads: pine siding, old fence pickets, or floor planks. The right conversation can uncover sweet deals no one else hears about.
Don’t shy away from imperfection. A visible crack adds authenticity; a warped board offers texture. Always check for soft spots or deep rot before loading up your trunk.
Online Marketplaces: Scripts and Safety
Phrase your search clearly: “Looking for reclaimed barn wood, pallet boards, or rustic siding for wall decor.” If someone asks why, respond with, “I build reclaimed wood wall decor pieces.” This invites honesty about the wood’s condition.
Prioritize sellers nearby. Meet in well-lit, public areas, and if possible, examine the boards on site for mold or major damage. Bring a screwdriver to knock off dirt or test firmness if needed.
Insist on dry, bug-free wood. Request extra photos of board ends and backsides. A short phone call before meeting can clarify bundles, measurements, and any stains you can’t see in the ad photos.
| Source | Pros | Cons | When to Use |
|---|---|---|---|
| Thrift Stores | Localized, low-priced | Limited selection | Filling small accent areas |
| Salvage Yards | Rich variety, historic pieces | Some prep required | Feature walls or headboards |
| Online Marketplaces | Wide search, direct deals | Scams, travel time | Consistent size projects |
| Pallets from Businesses | Free or cheap, easy access | Nails, rough wood | Rustic modern designs |
| Demo Sites | Large quantities, matching grain | Always ask permission | Full-room projects |
Cleaning and Preparing Salvaged Boards: Safety and Success
Being thorough saves love and labor down the line. Every reclaimed board for wall decor needs more than a quick dust-off; safety, sanitation, and durability come from a few extra steps.
Approach prep as a ritual: gloves, goggles, and patience. Removing every loose nail and deeply embedded staple matters for your hands, your tools, and your wall in the long run.
Easy Prepping Steps for Beginners
- Lay boards on a tarp or driveway for clear workspace—you’ll spot stray nails or screws faster, and cleanup’s a breeze.
- Start by tapping all surfaces with a hammer and prying out metal fasteners. Look underneath flaking paint for hidden nails.
- Use a stiff brush and shop vacuum. Dirt and little pebbles can dull saw blades quickly—five minutes brushing now means fewer problems later.
- Mix water with mild detergent and scrub with a sponge, always wringing out water to avoid soaking the wood. Let the boards dry in sunlight—a full afternoon, at least.
- Finish with a sanding sponge for a smooth touch. Avoid over-sanding, which erases character. Inspect for bugs before bringing boards inside.
Once boards pass your inspection, line up similar thicknesses—this trick makes wall mounting later much simpler and reduces the risk of projection or warping as humidity changes.
Protecting and Sealing the Surface
- Never skip wood sealer if you’re using kitchen or bathroom walls; it blocks moisture and food stains.
- Wipe each side with a clean cloth before sealing for best adhesion. Smudges can show through clear coats.
- Brush on water-based polyurethane, which dries quicker and keeps vintage colors intact. Wait for a no-rain day.
- Test a sample board for color changes. Some finishes darken old wood dramatically.
- Store finished boards flat, separated by cardboard. Stacking wet boards leads to glue and finish sticking them together.
Layering careful prep with safe sealing sets you up for dazzling reclaimed wood wall decor that lasts through moves, seasons, and style changes.
Designing with Reclaimed Boards: Composing Visual Harmony
Getting composition right brings every reclaimed wood wall decor project from okay to stunning. Start by choosing a focal point, then develop a game plan for orientation, rhythm, and integration with the room’s purpose.
Color and Grain Selection Strategies
Texture and hue direct the eye across the wall. If you blend boards with similar tones, the space feels unified. For drama, alternate colors: think streaks of gray, brown, and faded blue next to each other.
Trial arrangements on the floor let you visualize before installing. Swap in that rough-edged board when you want a wilder look, or choose straight, even-grained planks for a modern slant.
Lean towards odd-numbered groupings for organic energy—three, five, or nine boards typically look best resting side by side.
Planning Accent Walls versus Art Installations
Accent walls work when you treat the space as a backdrop, not the star. Let your board arrangement echo another architectural line—along a window or behind a bed, for example.
Wall art installations can break rules. Go for different-sized pieces at varying depths for a gallery effect. Staggered boards mimic city skylines or rolling landscapes.
If you’re nervous, sketch your plan or arrange boards on the ground first. Snap a phone photo, then shift boards until the pattern fits your vision.
Mounting and Finishing Strategies: Sturdy and Stylish Results
Connecting your reclaimed boards securely guarantees long-term satisfaction. Here, precision matters—straight lines and hidden supports turn rough finds into polished decor.
Using Hidden Supports for Professional Results
Mount horizontal battens (one-by-twos or metal brackets) across your studs. Screw boards into these supports from behind for a seamless face—a trick borrowed from craftspeople who want invisible fixes.
Measure twice, install battens level, then start from a visible edge and work inward. Pressing boards edge-to-edge minimizes gaps, delivering a streamlined backdrop even with different textures.
Bracket mounting works on concrete, drywall, or brick, but check every board for straightness. A warped board at the start multiplies flaws as you go.
Nailing Techniques and Edge Considerations
Face-nailing is quick—set nails through the board face into the wall. For rustic charm, leave nail heads shining; for cleaner looks, tap them just below the surface and hide with colored putty.
Trim and finish edges with a strip of matching or contrasting wood for a deliberate border. Mitered corners echo picture frames on display walls.
Always predrill holes to avoid splitting. In lower-traffic areas, glue and 18-gauge brad nails provide a delicate, invisible hold on thinner planks.
Adapting for Unique Spaces: Solutions for Corners and Odd Shapes
Every wall offers its quirks—outlets, windows, corners, and irregular niches. Adapting reclaimed wood wall decor to these spots can elevate the finished room beyond a flat expanse of boards.
Layering and Wrapping: Making the Most of Angles
L-shaped or U-shaped corners call for custom-fit boards. Scribe boards tightly along odd angles using a compass or a scrap of plywood as a spacer to ensure no gaps remain.
For dramatic effects, wrap boards around corners to visually connect adjacent walls. Use contrasting finishes for each plane, such as matte on one side and gloss on the other, to highlight the wrap.
Stagger ends for softer transitions, or align them for crisp lines that frame workstation nooks or reading corners.
Accommodating Outlets and Fixtures: Step-By-Step
Mark outlet boxes with painter’s tape before installation. Measure each cutout, allowing a hairline gap for wire clearance, and always remove outlet faceplates first for a snug fit.
Use a jigsaw or oscillating multitool for precision cuts—test fit each piece before securing it in place. Snap an after photo before replacing the outlet cover, capturing your progress.
Seal exposed wood edges around outlets for safety. For visible wires, consider surface-mount conduits painted to match your boards—they blend in and keep the look intentional.
Blending Decor Styles: Integrating Reclaimed Boards At Home
Reclaimed wood wall decor isn’t just for cabins. Mixing it into modern, traditional, or even eclectic spaces bridges old and new. The approach: match a board’s story with the mood you want in each room.
Complementing Modern Minimalism
Light gray or whitewashed boards support clean, minimalist vibes—no need for ornate carving or heavy texture. Use slender planks with sharp edge alignment for crisp lines above a sofa or in a home office.
Mount just one or two large reclaimed slabs as floating shelves. Wire-brushed finishes hold geometric books or metallic vases without competing for attention.
Soft LED backlighting behind a slim panel increases depth while keeping the rest of the palette cool and sculptural.
Supporting Boho or Farmhouse Warmth
Mismatched tones, visible knots, and aged patinas enhance layered, homey rooms. Hang a grid of small squares—each a different stain—as a laundry room or entryway accent.
For visual softness, combine your wall boards with woven textiles or potted plants. The tactile richness invites guests to touch and linger.
Lean upcycled picture frames or found signs against dramatic, wide-plank accent walls—no holes needed, just casual charm and depth on display.
Bringing It All Together: The Takeaway from Reclaimed Walls
Reclaimed wood wall decor delivers more than good looks—it acts as a green upgrade, puts your stamp on a space, and gives life to wood that would otherwise be wasted.
Intentional sourcing, thoughtful prep, and original layouts bring out each board’s unique spirit. Every project becomes a mini legacy, blending your style with generations gone by.
Invite friends or family into the creative process. These walls spark stories, warm the atmosphere, and set the scene for memories as lasting as the wood itself.
Frequently Asked Questions
What’s the best way to find reclaimed wood for wall decor?
Visit local salvage yards, thrift stores, or online platforms like Craigslist and Facebook Marketplace. Ask about old fences, barns, or leftover renovation wood to uncover hidden treasures.
Do I need to clean reclaimed boards before using them?
Absolutely. Remove nails, scrub with mild soap and water, and let dry thoroughly. Sand lightly to bring out grain and eliminate rough surfaces. Safety and appearance both depend on prep.
Is reclaimed wood wall decor safe for kitchens and bathrooms?
Yes, if you use a moisture-proof sealer on all sides. Prioritize woods that weren’t chemically treated, and always inspect for signs of fungus or pests before mounting.
Can I mount reclaimed wood on any wall surface?
Most surfaces—including drywall, brick, and concrete—are fair game with proper anchors or battens. For rentals, try attaching boards to removable plywood panels you can take with you.
How do I blend reclaimed wood with my current decor?
Choose board colors and finishes that echo your existing soft furnishings or paint. For bold looks, contrast grains or shades. Test layouts on the floor to see how each piece fits your room’s vibe.


You may also like


The Pros and Cons of Online Loans: Smart Choices for Canadians
Explore the pros and cons of online loans to decide whether digital lenders offer the right convenience and flexibility for you.
Keep Reading