DIY Home Décor
Easy Pallet Projects for Rustic Home Décor: Transform Any Room with Simple DIY Ideas
Transform your space with easy pallet projects for rustic home décor. Learn step-by-step techniques for walls, stylish furniture, and clever storage. Bring warmth and creativity to every room today.
Advertisement
Walking into a room with a custom-made vibe feels naturally inviting. Repurposed wood brings authenticity, and among all materials, incorporating pallet projects into home décor instantly delivers that welcoming, rustic look.
Pallet wood has become a staple in approachable decorating, reflecting a desire for handcrafted character. Whether creating wall art, storage, or furniture, these projects add function and personality without emptying your wallet.
If you crave clever tips and realistic steps, keep reading. You’ll find actionable advice and tried-and-true methods for building beautiful, rustic pieces with pallets for every part of your home.
Transform a Blank Wall with Pallet Accent Features
Giving your living space an eye-catching wall accent begins with arranging pallet boards in creative layouts. Positioning the wood horizontally or vertically changes the room’s feel, with each approach conveying a different mood.
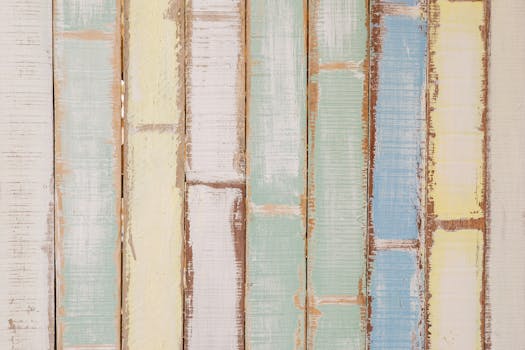
Highlight specific zones, such as behind the couch or bed, by framing the area with pallet planks. Use varied board lengths and mix muted finishes for a farmhouse look that’s both intentional and stylish.
Use Alternating Stain Tones for Depth
Applying stains in contrasting tones mimics weathered barnwood. Dip a brush in dark stain, working it into the grain, then wipe away excess. Alternate boards with lighter hues, repeating until the entire accent looks layered and natural.
A homeowner might say, “I want visual depth but not a patchwork effect.” Choose adjacent tones—gray and honey, for example—for transitions that feel unified, not random.
Apply two coats of polyurethane after staining for a smooth, touchable finish. This preserves your hard work against dust and occasional knocks, keeping the surface attractive over time.
Incorporate Metal Hardware for Contrast
Adding black or antique brass hooks to a pallet wall brings an element of function and flair. Arrange hooks at regular intervals so hats, scarves, or bags have natural homes, seamlessly blending décor with utility.
Assembling the wall accent with exposed screws in matching metal tones draws the look together. Someone redoing their entryway might say, “Hooks make it easy to hang up everything I bring in.” Position hooks at kid-friendly heights for added practicality.
Pallet boards paired with metal hardware keep things grounded visually. The scheme suits busy households eager for organization without compromising on rustic charm, offering display and storage in one.
| Style Option | Finish Method | Materials Needed | Takeaway |
|---|---|---|---|
| Barnwood Accent | Gray stain, sanded edges | Pallet boards, gray stain | Use for calm, weathered look—great behind sofas |
| Modern Rustic | Whitewash plus clear sealant | Pallet boards, white paint, sealant | Brighten dark rooms while keeping natural wood grain |
| Bold Pattern | Chevron layout, mixed stains | Pallet planks, two stains, miter saw | Add movement to empty walls in entryways |
| Industrial-Easy | Metal hardware with raw wood | Hooks, angle brackets, raw boards | Combine storage with rugged display for busy spaces |
| Farmhouse Mix | Distressed paint, wax finish | Chalk paint, sanding block, wax | Create faded hues that echo classic country style |
Build Functional Furniture that Suits Everyday Use
Construct durable, storage-savvy furniture by leveraging the solid structure of pallets. Sofas, tables, and bookcases get a rustic upgrade while supporting daily routines.
Measure your available space before starting. Pallet projects for furniture succeed when dimensions match a room’s needs, not just its style.
Design a Simple Coffee Table
Stack two pallets and secure them together with wood screws. Sand rough spots and finish with a protective coat. Attach casters for mobility or add a glass top for elegance.
This approach results in a sturdy table that’s easy to move when cleaning or rearranging. Someone might note how the visible pallet slats create built-in compartments for remotes or magazines.
- Measure twice before stacking boards to avoid imbalance and wobbly surfaces.
- Choose pallets with unbroken slats for uniform appearance and smoother finish.
- Sand all surfaces thoroughly—splinters can snag clothes or skin during daily use.
- Use clear polyurethane for wipe-clean convenience while keeping wood tones warm.
- Decide if you want lower storage (magazines, baskets) and adjust height accordingly.
Finish the table by rounding off corners or painting casters for visual consistency. This quick change lets the piece blend in with existing furniture.
Add a Bookshelf with Pallet Ends
Position two upright pallets a few feet apart. Secure shelves cut from extra pallet boards between them using angle brackets, then reinforce with wood glue for extra strength.
- Check the vertical alignment before attaching shelves to avoid slanted book rows.
- Paint the shelving inside a soft pastel to highlight displayed objects and books.
- Use a mix of shelf heights for both small paperbacks and larger art books.
- Drill pilot holes for every screw—this prevents boards from splitting under weight.
- Bracket each shelf from underneath to ensure stability for years to come.
This approach means even beginners can showcase favorite volumes in sturdy, rustic fashion. The shelf instantly adds character and function to reading nooks.
Create Engaging Storage with Pallet-Style Racks and Crates
Pallet projects shine when used for creative storage. These designs fit seamlessly into mudrooms, bedrooms, and patios, offering visible places for personal items while keeping things organized and appealing.
Tow hooks, baskets, or mounted crates built from palettes add convenience, encouraging everyone to put belongings away after use.
Wall-Mounted Entryway Rack Techniques
Turn a single pallet into a slim profile entry rack. Remove every other slat for an open feel, then finish with oil for richness. Mount at eye level by screwing directly into studs.
This technique keeps keys, leashes, and reusable shopping bags accessible. Using body posture as your guide, position hooks at elbow height so one-handed hanging feels natural when returning home.
Write quick chalk labels on each slat for named cubbies, helping kids and adults know where things go even during the morning rush.
Outdoor Storage Scenarios
Build waterproof crates from pallet slats and line the interiors with heavy-duty fabric. Place under a covered porch for hiding boots or garden tools, then stack vertically to save floor space.
Seal outdoor crates with marine-grade varnish. When unloading dirty gear after a rainy hike, drop muddy shoes into the open crate so the elements stay outside.
Group crates in twos as easy-access toy bins for energetic kids. The rugged material holds up to rough use, keeping patios or garages tidy without stress.
Design Custom Bedroom Details with Minimal Tools
Pallet projects let you personalize bedroom décor even with basic tools. Headboards, bedside organizers, and decorative shelves all make cozy upgrades without requiring advanced woodworking skills.
Attaching boards directly to the wall or existing furniture means results come quickly, and each addition brings warmth and texture to downtime spaces.
Build a Simple Pallet Headboard
Lay three to four full-length pallet planks side by side. Secure them together with two shorter boards placed horizontally at the back. Add extra support if mounting to the bed frame.
This approach gives a room a grounded, rustic feel. Paint initials in soft chalk paint for personalization or drape string lights over the top during holidays for extra charm.
Sand the finished edges smooth so leaning back with a pillow feels comfortable. Attach securely using wall anchors if mounting directly to the wall.
Set Up Functional Bedside Cubbies
Convert a single pallet slat into a slim bedside cubby by attaching a divider. Fasten to the side of your bed frame or nightstand, then store books and electronics within reach when winding down.
This prevents bedtime clutter and saves time searching for glasses or charging cords. Paint the outside to match existing décor or leave natural for an unfinished, organic touch.
Add a soft felt liner to protect delicate items like watches or glasses. This flexible organizational trick fits small bedrooms or studio apartments easily.
Style Living Areas with Pallet Art and Display Frames
Display meaningful artwork and keepsakes using pallet wood as a canvas. These personalization options make living rooms or home offices feel distinctly yours, adding subtle dimension wherever space allows.
Every frame or accent piece stands out for its visible grain and textured surfaces, keeping walls interesting without overwhelming the eye.
Handmade Photo Displays
Attach mini clothespins along a pallet board. Hang photos or postcards in changing arrangements based on the season or personal milestones. Screw in hanging wire to mount the board safely above a desk or hallway table.
This style lets you swap images on a whim. During graduation season, display proud moments and later update with travel highlights to inspire future adventures.
Stain boards in colors that match your existing picture frames to tie the display together visually. This technique pairs especially well with monochrome or vintage prints.
Showcase Plants or Collectibles
Use pallet offcuts as ledges for small potted succulents. Attach two brackets per shelf for security, then stagger multiple ledges at varying heights to break up empty wall space.
The tiered shelves draw the eye upward, creating the illusion of taller ceilings in compact living rooms. Slot sentimental trinkets between plants for a truly customized look.
A quick analogy: Layering these mini shelves is like creating a gallery wall for three-dimensional objects. The mix of greenery and memorabilia keeps guests guessing at every new detail.
Finish and Maintain Pallet Projects for Longevity
Extending the life and appeal of your pallet projects takes only a few inexpensive supplies. You can protect surfaces, deepen natural color, and ensure that all DIY investments continue to pay off for years.
Applying protective sealants and caring for outdoor pieces differently than indoor ones helps wood withstand daily wear, sunlight, and shifting temperatures.
Indoor Care Rules
Use milder products—like water-based polyurethane—for indoor pallets. Sand major surfaces first, then apply two thin coats. Let dry overnight before using the item to avoid sticky spots or accidental smears.
Store touch-up markers in a drawer. Should you spot the occasional scuff, a quick rub blends in marks without disassembling—or repainting—the project.
Place felt pads under furniture legs to protect both floors and pallet wood. A wheeled coffee table stays easy to move, while being less likely to scratch the surface below.
Outdoor Preservation Methods
Exterior projects need a different approach: marine-grade varnish shields against moisture, while oil-based stains provide deeper, weather-resistant color. Repeat coatings yearly or after harsh seasons to keep pieces looking new.
Raise planters or crates on small bricks to allow airflow. This simple step discourages standing water and rot, extending the usable life of every outdoor pallet item.
Wipe down surfaces occasionally with a damp rag. Avoid harsh cleaners that could strip finishes or leach color in sunlight. Consistent, gentle care keeps projects fresh.
Practical Tips that Make Pallet Projects Feel Seamless
Planning goes a long way in making pallet projects efficient and stress-free. Proper selection, preparation, and assembly techniques save time and increase the polish of the final product.
Try these concrete practices for smoother projects and a more enjoyable process.
- Inspect all pallets before use for embedded nails or labels—removing hazards prevents injuries and ensures only clean, quality wood gets repurposed.
- Choose heat-treated (HT) pallets for indoor projects—they’re safer and less likely to carry chemicals, making them ideal for beds or surfaces touching stored food.
- Work outdoors when cutting or sanding. Pallet wood can be dusty, and spreading out gives room for safer tool operation and quick clean-up.
- Always pre-drill screw holes. This prevents splitting, especially in older boards that might be drier and more fragile than new lumber.
- Keep extra sandpaper and wood glue on hand. Small repairs and finish touch-ups are easier to handle if they’re within arm’s reach during assembly or installation.
Bring Warmth to Your Home, One Pallet at a Time
Repurposing pallets means bringing meaningful, hands-on touches to your spaces. Bit by bit, each project adds story and substance—a tactile reminder of your creativity and resourcefulness in shaping your home.
From accent walls and custom furniture to thoughtful storage, pallet projects reward you with flexibility and naturally striking results. They also build skills with each completed piece, letting your rooms evolve at your own pace.
Whether updating a single room or refreshing the entire atmosphere, these ideas offer a fresh perspective. You turn discarded materials into centerpieces that invite admiration. The only limits are your imagination and willingness to try.
Frequently Asked Questions
Are all pallets safe for indoor projects?
Not every pallet is suitable for indoor use. Choose those stamped “HT” for heat-treated—these haven’t received chemical treatments, making them safer for headboards, shelving, or use near food.
What basic tools do I need to start with pallet projects?
You’ll need a circular saw or handsaw, a power drill with Phillips and flat bits, sandpaper, a hammer, and a pry bar. For comfort and safety, also use gloves, safety glasses, and a dust mask while working.
How can I achieve a consistent rustic look with different pallets?
Stick with similar finishes, such as all dark stains or all whitewash. Sand uneven spots uniformly and apply a consistent protective coat to unify tones, even if the woods started out slightly different in color.
What’s the easiest pallet project for a first-time DIYer?
A wall-mounted coat rack or a simple crate is an ideal first project. Both require few cuts and minimal supplies, allowing beginners to see results quickly and practice basic skills without major risks or mistakes.
How do I clean and maintain indoor pallet furniture?
Dust surfaces with a soft cloth, wipe off spills quickly, and avoid leaving wet items directly on the wood. For scratches, use wood touch-up markers. Reapply sealant every couple of years for protection and shine.
You may also like

How to Refinance a Loan and Lower Your Monthly Payments
Find out how to refinance a loan effectively, reduce your monthly payments, and manage your debt with smarter financial planning.
Keep Reading