Storage & Organization
DIY Shelving Projects: Creative Space Solutions for Every Room
Find out how to use DIY shelving projects to save space in every corner. Get concrete tips, easy materials picks, and expert advice for quick room makeovers and clutter-free living.
Advertisement
Running out of space can feel frustrating, especially when your belongings start to pile up. There’s a real satisfaction that comes from finding creative solutions, like diy shelving projects, to restore order and showcase your personal style in any room.
Efficient use of vertical space makes all the difference. Saving space isn’t just a trend; it offers clear benefits—your home becomes easier to clean, simple to decorate, and less cluttered. Shelving projects can deliver exactly that.
Read on for practical guidance and room-by-room solutions. This article highlights actionable diy shelving projects paired with relatable advice, ensuring you’ll find resources and inspiration to kickstart your organizing journey today.
Transform Dead Space with Floating Shelves
You’ll maximize wall potential immediately by adding floating shelves. This approach creates instantly usable storage above furniture, doors, or entryways without taking up floor area.
Installing floating shelves turns forgotten nooks into functional display spots. A sofa-side wall or the bathroom above a towel rack suddenly offers usable real estate for books, decor, or toiletries.
Choosing Materials That Suit Your Style
Solid wood planks, metal brackets, or even recycled boards can all serve your design—imagine someone holds up samples in the store and says, “Let’s make it match the trim!”
Dark stained woods bring warmth, while slick white paint adds a modern touch. Textured metals or pipes create industrial charm. Select finishes you’ll enjoy seeing daily.
Pick shelf depths based on use. Thinner boards suit small frames; deeper shelves hold plants or baskets. When in doubt, cut cardboard templates for sizing before purchase.
Clear Anchoring Rules for Safety and Longevity
Use a stud-finder to locate secure support in drywall—one smart friend says, “If you skip this, the shelf slides down after a week.” Choose appropriate anchors or brackets to secure weight.
For heavier loads, fix directly into wall studs. For lighter, decorative items, toggle bolts or drywall anchors support the shelf safely. Check all hardware before and after installation for stability.
Test shelves by gently pressing down after installation. If there’s movement, reinforce. A sturdy installation will handle everyday grabs, shakes, and gentle nudges.
| Material | Best For | Style Example | What to Do Next |
|---|---|---|---|
| Solid wood | Living rooms, bedrooms | Rustic, natural | Seal and sand before mounting |
| Reclaimed boards | Entryways, kitchens | Eclectic, earthy | Clean and test for strength |
| Painted MDF | Bathrooms, offices | Modern, bright | Prime edges to prevent warping |
| Metal brackets | Garages, laundry rooms | Industrial, sturdy | Anchor firmly into studs |
| Floating glass | Display shelves | Minimal, sleek | Install with specialized brackets |
Wall-Mounted Units for Kitchen Storage Wins
Wall-mounting cabinets or shelves in kitchens frees precious counter space right away. Elevate spices, dishes, or utensils to eye-level, streamlining meal prep and clean-up routines daily.
Above the counter, install shallow shelves for common ingredients or mugs. By moving these items off flat workspaces and onto stylish diy shelving projects, you make cooking less frantic and more enjoyable.
Organizing Kitchen Essentials without Clutter
Sort utensils, plates, and spices before shelf installation. Keep frequently-used tools nearest the cooking area; less-used gadgets can go up high or out of direct reach.
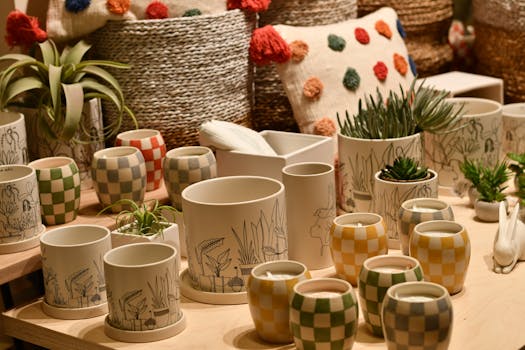
Group similar items—like coffee cups or cereal jars. Clear glass jars or labeled baskets prevent misplaced ingredients and keep shelves looking consistent and tidy after every use.
- Group by activity: Place all coffee items above the brewer to streamline mornings—no last-minute searches.
- Use uniform containers: Matching jars or bins keep open shelves looking intentional and organized instead of random and busy.
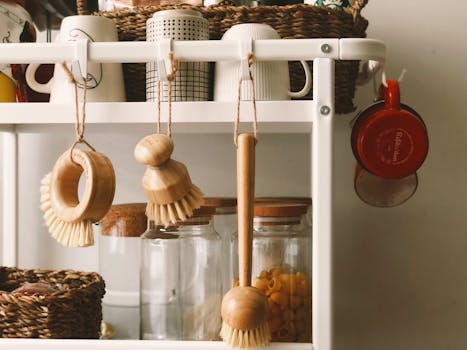
- Install hooks below shelves: Hang mugs, utensils, or towels to use every inch of vertical space.
- Label everything: Adhesive or chalk labels ensure everyone stores items in the right place, even guests or kids.
- Stack vertically: Use risers or tiered racks to layer plates or spices, maximizing usable shelf height efficiently and safely.
Stand back and assess—move items if shelves feel too busy. Keep only everyday items in immediate reach, storing bulk or rarely-used goods elsewhere for a streamlined kitchen look.
Eco-Friendly Tips for Sustainable Kitchens
Opt for shelves made of bamboo, recycled wood, or locally-sourced materials. From an eco-enthusiast: “If it’s sustainable, it benefits both your kitchen and the environment.” Choose low-VOC paints for shelf finishes.
Arrange ingredients in glass jars, reducing single-use plastic waste. DIYers can upcycle old doors or pallets for custom shelves. Repurpose leftover tiles or stones as heat-safe shelf inserts for hot pots and pans.
- Choose locally-sourced woods: Reduces carbon footprint and supports nearby businesses for materials acquisition.
- Repurpose old furniture: Transform desk drawers or cabinet doors into new shelving units, prolonging item life and reducing waste.
- Use eco-sealants: Apply natural oils or water-based polyurethane instead of traditional toxic finishes.
- Decorate with potted herbs: Double-function shelves as storage and kitchen garden to promote sustainability and add visual interest.
- Share and swap: Coordinate with neighbors to exchange leftover boards, brackets, or finishes for truly low-waste projects.
Every small decision turns kitchen shelving into a habit of sustainable living—visible eco-friendly choices encourage thoughtful consumption in everyday routines.
Creating Vertical Libraries and Display Zones
Transform bare walls into book displays or memory galleries. Mounting vertically-stacked shelves lets you proudly showcase collections while keeping them in reach for daily enjoyment and inspiration.
Unlike standard horizontal shelving, vertical shelf towers or staggered shelves create visual interest and break up empty wall space dramatically with the help of diy shelving projects.
Showcasing Collections That Tell a Story
Line favorite novels, vinyl records, or framed photos up a narrow hallway wall. A teacher once shared, “Every time I walk by, I remember family trips and favorite stories—arranging shelves by memory helps keep those moments close.”
Switch up display items seasonally. Summer shells, autumn leaves, or holiday cards instantly refresh the space. Rotate treasured pieces so the routine of cleaning or reorganizing sparks joy and nostalgia.
Add a spotlight or LED strip beneath each shelf for nighttime ambience. Lighting features transform a practical shelf into a gallery, catching visitors’ attention and casting gentle shadows on beloved items.
Design Rules for Safe Vertical Installations
Space shelves around 12-15 inches apart to fit most books, albums, or décor. Avoid overloading tall units—bolting into studs or using anti-tip straps guarantees shelves won’t budge, even if kids run by or pets brush past.
Stick to lightweight objects above head height. Place heavier items at waist or below. “Keep pottery low and paperbacks up high,” a book-lover said, recounting a shelf mishap from putting a heavy vase too high.
For extra security, use deeper bottom shelves as informal bookends—tall side panels can also keep contents from toppling off. Take time after installation to check wobble and weight distribution before filling completely.
Entryways That Welcome with Style and Function
Outfitting your entryway with durable shelving can instantly corral shoes, coats, mail, and keys. You create a habit zone: everything has a landing spot, so leaving and coming home feel smooth and stress-free.
Sturdy cubbies with hooks above offer grab-and-go access. Incorporating woven baskets or small trays on diy shelving projects keeps small items, like wallets and sunglasses, right by the door when you need them most.
Mini-Mudroom Design for Tight Spaces
“Our hallway is narrow, so we mounted a shallow shelf at shoulder height for hats, a lower peg rail for kids’ backpacks,” says one parent. “Shoes go in cubes below.”
This entryway routine keeps shoes and bags off the floor. Color-coded labels—by name or family member—make coming and going quicker. Friends notice how the neat system makes the small space more welcoming.
Hang a mirror above shelving. It adds light, lets you check your look before heading out, and visually doubles the space, making cramped zones feel open and calm.
Building for Busy Lifestyles: A Checklist
When designing entryway shelving, plan for real traffic. Use wipeable surfaces, consider waterproof tray inserts for muddy shoes, and bolt units securely to studs to avoid tipping hazards.
Functional baskets organize seasonal gear—fold-away scarves in summer, mittens in winter. Use a wall-mounted mail slot above shelf units; quickly sort bills, coupons, and outgoing letters as you walk in the door.
Finish shelves with non-slip pads so baskets stay in place. Use color, texture, or small decorative bowls to encourage everyone to drop in keys or garage openers by habit, keeping surfaces clear and tidy.
Bathroom Solutions: Maximizing Small Footprints
Compact bathrooms often frustrate homeowners—but diy shelving projects set above toilets, below sinks, or beside the shower transform wasted inches into much-needed storage for towels, toiletries, and extra supplies.
Clever Shelf Placement for Everyday Needs
Install an open shelf just above towel bars for extra toiletries. Mount slim rolling carts—no wider than a toilet paper roll—between the tub and vanity for customizable, movable storage.
Stacked corner shelves efficiently hold skincare, bath toys, or shaving kits. “Everything is now in arm’s reach before work,” shares a renter who clipped wooden crates together into vertical bath shelves beneath the mirror.
Leave space between the lowest shelves and the floor—room to mop, stow a laundry basket, or retrieve something dropped by a child—cleaning becomes less of a chore.
Maintaining Order and Freshness Long Term
Only restock what fits on open shelves. Store backups in a linen closet. Routine purges keep items from multiplying—set a reminder monthly to toss expired lotions or empty bottles.
Keep shelf surfaces dry. Use water-resistant finishes or shelf liners for wood and wicker. Scent pouches, a candle, or a sprig of eucalyptus above the shower keeps the atmosphere pleasant and personalized.
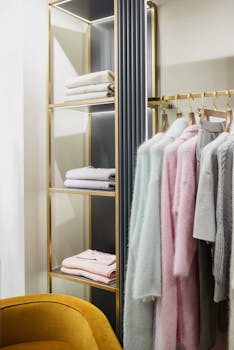
Rotate decorative towels or accent jars with the seasons. This keeps routine tidying fresh and boosts the sense of luxury—like stepping into a boutique hotel, right at home.
Kids’ Rooms: Adapting Shelves as They Grow
Shelving in a child’s room makes getting ready easier—everything from art supplies to favorite books is easy to find and put away again. Dedicating labeled shelves for toys, clothes, and homework encourages independent habits.
Flexible Storage That Changes with Needs
Install adjustable shelves on wall tracks—one parent installs pegs low for toddler “reach zones,” then moves them up as kids get taller. Crates on wheels turn into rolling toy bins or become laundry baskets as kids grow.
Bright labels or picture signs help those not yet reading. A simple rule for daily tidying is: “Books here, shoes there, dinosaurs anywhere else!”—playful guidelines turn clean-up into a game.
Floating book ledges at head-height display tonight’s bedtime stories, encouraging nightly reading rituals without a messy pile next to the bed.
Making Space for Hobbies and Collections
Encourage special interests—install a shelf for Lego builds, art projects, or action figures with dedicated display stands. “When my model airplanes finally had a home, they stayed dust-free and safe,” says one teen.
Use clear bins or small baskets for smaller pieces; attach chalkboard labels so storage can change as collections rotate. Built-in cork strips, hung at kid-level, let children swap out artwork quickly.
Reserve a high shelf for keepsakes—trophies, yearbooks, or delicate models. Teach children to move items as their needs and interests grow, fostering lifelong organizing habits.
Smart Garage and Utility Room Transformations
Add wall shelves or track systems to garages and utility rooms. Whenever someone says, “I can’t find the screwdriver,” it means too much is buried in bins or unmarked boxes. Shelving solves the chaos efficiently.
Storing Large and Small Tools Safely
Use heavy-duty brackets and thick shelving boards for power tools or paint cans—garages need shelves that survive a dropped hammer or jolted ladder leaning against them.
Magnetic strips work for metal tools, and pegboards above a shelf let you hang drivers, wrenches, or gardening gloves. This visual display saves time during fast repairs or big projects.
Low shelves keep heavy items, like oil, at safe reachable levels. Label each shelf—for quick access, mark with tape or stencils: “paint,” “hardware,” or “emergency supplies.”
Cleaning and Laundry Essentials at Arm’s Reach
Mount shelves above washers, dryers, or utility sinks for detergents, sponges, and sprays. Slim wall baskets hold dryer sheets or lost-and-found socks. “Our laundry ran smoother once everything had a clear, high spot,” says one homeowner.
Install hooks beneath shelves for mops and brooms—keeping tall tools upright and dry. Corral cleaning cloths in stackable bins to avoid mismatched piles or missing helpers during big cleaning days.
Keep a step-stool handy on a wall hook, so anyone can access high supplies safely. Post laminated lists on a shelf end for common tasks: “Start load, clear lint trap, restock detergent,” for stress-free laundry cycles.
Making the Most of Every Niche: Final Thoughts on DIY Shelving
Across every room, diy shelving projects unlock useful space without major renovation. Each idea—from floating living room shelves to kid-friendly storage—offers a tangible strategy that you can personalize and refine to match your lifestyle and taste.
Embracing creative shelving means less clutter and more harmony. The right shelf isn’t just storage—it’s a habit builder, art display, or sanity-saver during busy weeks. Every new project can signal a fresh routine in your daily life.
Start with one shelving solution where you notice the most daily frustration. Over time, add more as your needs shift. Your home evolves with you, and these space-saving projects keep you organized every step of the way.
Frequently Asked Questions
Which tools are required for most diy shelving projects?
Basic shelf projects usually need a drill, level, stud-finder, screwdriver, anchors or screws, and a tape measure. Advanced units might also use a saw or wall brackets—always check the DIY kit for specific tool recommendations.
How much weight can DIY floating shelves realistically support?
If mounted into studs using proper brackets or anchors, most floating shelves hold between 20 and 50 pounds each. Distribute weight evenly and test with lighter items before adding more. Never exceed hardware or manufacturer guidelines.
What material is best for affordable, sturdy shelves?
Painted pine or plywood remains a budget-friendly, reliable choice. Reclaimed boards or deck planks offer extra strength and style. For moist areas, such as bathrooms or laundry rooms, treated wood or moisture-resistant MDF performs well long-term.
How can you safely install shelves in a rental property?
Seek permission before drilling. Use removable wall anchors, command strips, or standing shelving units. Small holes can be patched with spackle before moving out. Free-standing, modular systems provide flexibility without damaging walls.
Are DIY shelves worth the investment versus store-bought options?
Custom diy shelving projects fit both space and personality, often costing less than pre-made alternatives. DIY also lets you choose finishes, depths, and accessories. Store-bought can be quicker but may not suit irregular spaces or reflect your style.