DIY Home Décor
DIY Mirror Frames: Creative Ideas to Boost Home Style and Space
Upgrade your home with DIY mirror frames that add unique style and depth. Get practical tips, smart materials, step-by-step guides, and budget-friendly ideas for mirrors that truly shine in any space.
Advertisement
Choosing Your Mirror and Planning the Frame
Comparing Mirror Styles for DIY Frames
Consider a rectangular mirror for entryways, turning it horizontal for hallways or over a mantel. This shape keeps projects simple and helps maximize reflected light.
Round mirrors soften a room’s lines and break up boxy spaces. They require precise measurements for frame templates, making them ideal for those seeking a rewarding challenge.
Ornate or vintage mirrors add instant character but may need special adhesives, due to shaped or beveled edges. Choose these for an antique look—test-fit pieces before final assembly.
Common Frame Materials and Their Effects
Hardwood (like oak or walnut) suits traditional and farmhouse interiors and stains easily. Use wood glue for invisible seams; clamp together for at least 2 hours as the glue sets.
Pine offers an affordable route for rustic or cottage styles. Light sanding removes splinters; after painting or distressing, its versatility shines around both bathroom and living room mirrors.
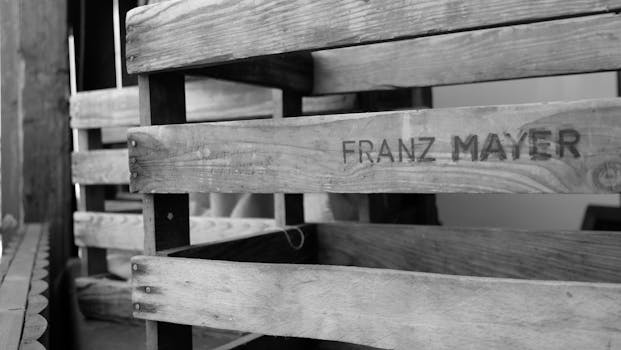
Reclaimed barn wood or pallets bring eco-friendly flair and undeniable charm. Always check boards for nails or pests. A quick brushing and sealant keep the patina without dragging dirt indoors.
| Material | Best For | Finish Options | Next Step |
|---|---|---|---|
| Hardwood | Formal rooms | Stain, poly | Polish before cutting |
| Pine | Cottage/rustic | Paint, whitewash | Sand and prime |
| Barn wood | Farmhouse, eco | Sealant only | Inspect for nails |
| MDF | Budget projects | Paint, veneer | Cut precisely |
| Metal edging | Industrial/modern | Polish, patina | Use metal primer |
Tools and Safety Must-Dos for Frame Building
Having the right tools improves results and makes crafting diy mirror frames less daunting. Basic gear includes a miter saw, level, wood glue, painter’s tape, and a clean work area.
Reliable safety practices, like wearing goggles and gloves, ensure hazard-free progress. Dull blades can splinter wood or chip glass, so inspect and replace cutting gear as necessary.
Setting Up Your Workspace
Designate a big, flat surface for assembly. Place cardboard or a drop cloth below to protect both your mirror and floors from dust or glue beads.
Keep extension cords untangled and out of walkways. Charging your drill and gathering all fasteners in one tray minimizes time spent searching for missing pieces mid-project.
- Grab goggles before cutting: Sawdust travels quickly and even softer wood can produce sharp debris.
- Clamp each edge: This prevents shifting and guarantees straight, flush corners—especially when using mitered (angled) cuts.
- Ventilate the room: Adhesives and paints can irritate lungs. Open windows or run a fan to keep fumes away as you work.
- Use a mask when sanding: Even a quick rough-up sheds fine dust. Breathing protection is a must, especially with old or painted wood.
- Test adhesives on scraps: Some glues react poorly with mirror backings or paint. Practice first for a hassle-free bond.
After workspace prep, set the mirror aside and assemble all frame components dry to ensure every piece lines up before gluing or nailing.
Essential Pre-Build Safety Habits
Before each work session, double-check outlets, blades, and extension cords for damage. Simple routines help guarantee stress-free building and a safe workspace.
Store sharp tools in a closed box when not in use. Unplug saws and drills between stages so kids or pets can’t accidentally start them.
- Double-check blades: Replace any knife or saw blade if it pulls or grabs rather than glides smoothly through wood.
- Secure loose clothing: Roll up sleeves and tie back hair to reduce accident risk around spinning blades or sanding pads.
- Keep water nearby: A spray bottle can clean up glue immediately before it dries and reduce smoky smells during sanding.
- Label containers: Assign bins for nails, screws, and glues so the right supply is always within reach.
- Work in daylight: Proper lighting keeps hands, tools, and corners visible for both cutting and assembly phases.
After adopting these habits, you’ll focus more on creativity and precision, not stress or avoidable messes.
Customizing with Paints, Stains, and Decorative Touches
Adding color or texture elevates basic frames into unique art statements. Your choices impact light reflection, tone, and the room’s perceived warmth or coolness.
Set aside time for paint to cure completely. Don’t rush assembly with wet surfaces—smudges or sticky fingerprints undermine even the most beautiful finish.
Mixing Colors and Finishes for Contrast
Try painting outside of your comfort zone—a high-gloss color for a kids’ playroom or matte black for extra moodiness in a bedroom.
Apply two thin coats rather than a single thick one. This prevents drips and speeds up drying, all while reducing harsh odors or streaks.
Mixing paint and stain can create highlights. A stained wood base with painted trim instantly feels curated, practically made-to-order for eclectic living spaces.
Adding Details: Ropes, Beads, and Molding
Frame your diy mirror frames with nautical flair using jute rope. Start by hot-gluing rope edge-to-edge in a slow spiral; press each row so there are no visible gaps.
For a boho or vintage look, line the inside edge with wood beads. Symmetry counts here—outline bead placement lightly in pencil before you glue to keep rows even.
Decorative molding introduces architectural interest. Try layering flat and curved pieces for depth, mitering corners at 45 degrees for a pro finish without specialized skills.
Budget-Friendly Frame Options to Try Right Now
Simple, accessible techniques make diy mirror frames perfect for renters or first-timers. These methods avoid specialty tools and depend mostly on basic materials like adhesive strips and thrift store finds.
Frugal ideas extend beyond wood. Flexible PVC moulding, picture frame kits, and even peel-and-stick wallpaper can transform a mirror with limited time or money investment.
Sticker-Style Frames from Removable Wallpaper
Cut peel-and-stick wallpaper into strips wider than your mirror’s border. Line up the first piece, smoothing from the center outward to prevent bubbles.
Overlap seams slightly and trim the edges with a sharp craft knife. Finish by wiping down the surface—the wallpaper not only adds style but also cleans up easily.
Worried about mistakes? Removable wallpaper lets you lift and reposition each strip as needed without residue, making it perfect for apartment dwellers or seasonal updates.
Upcycling Picture Frames for Mirrors
Raid thrift shops for large frames with glass inserts. Discard the glass and mount your mirror with strong adhesive or corner brackets.
Match paint touch-ups to existing decor for a seamless look. Group several framed mirrors together for a gallery-style effect without overwhelming a small space.
If the back of the frame is deep, insert pressed botanicals or swatches of fabric behind the mirror for color and tactile interest.
Making Small Spaces Feel Larger with Smart Framing
Careful placement and frame choices amplify light, create an airy atmosphere, and make narrow rooms feel less cramped. Strategic diy mirror frames act like visual shortcuts, expanding sightlines or drawing eyes upward.
Vertical Mirrors to Stretch the Ceiling
Install a tall, thin mirror in a hallway with a slim, painted frame to accentuate verticality. Guests will perceive both height and depth, making cramped areas appear more open.
A matte-finished frame avoids unwanted glare while reflecting more light, especially when placed across from a window. Use high-contrast trim to further emphasize vertical lines visually.
Test placement by standing back and checking what reflections dominate—windows work best, but artificial light sources help after dark.
Horizon-Expanding Groupings
Arrange three or four same-sized framed mirrors side by side above a sofa. This technique mimics a larger window and maximizes natural illumination in living or dining rooms.
Choose frames of similar weight and color for coherence, using small spacers to guarantee even gaps. Consider metallics or white tones to keep things light and uncluttered.
For open-concept homes, stagger mirror heights slightly for a casual, layered look. You’ll reflect plants, art, and coziness—all in one area.
Framing for Statement and Drama in Main Rooms
Bolder diy mirror frames become statements, anchoring a space in the same way a great rug or chandelier commands attention. Aim for maximal impact by going oversized or using rich materials.
Unexpected Coverings: Leather, Bark, and Metal
Glue strips of faux leather around the frame for a sleek, masculine look in a study or library. Cording or upholstery tacks add polish, making it look bespoke rather than DIY.
Bark or driftwood attached in mosaic fashion infuses earthy personality—ideal for a cabin or cottage, especially over stone fireplaces or in nature-themed rooms.
Polished metal edges, secured with screws or metal adhesive, suit contemporary lofts. Keep lines clean; wipe away all adhesive residues for a crisp, gallery-ready feel.
Curating Gallery Walls with Mirrors and Frames
Mix framed mirrors with art prints for dynamic gallery arrangements in living rooms or stairwells. Echo frame styles for unity but play with varied finishes for depth.
Remember grid layouts offer formality, while organic spreads (circles, ovals, and rectangles) suggest playfulness. Mimic professional designers by laying pieces on the floor and moving them until a pleasing mix appears.
Anchor your arrangement with the largest mirror at eye level and fill remaining spaces outward, keeping sightlines and reflective angles in mind for the brightest results.
Conclusion: Building Style, Depth, and Confidence with DIY Mirror Frames
From picking the right shape and materials to detailing and placement, every step in customizing diy mirror frames strengthens both your space and your skills.
Whether exploring thrifty transformations or bold frame statements, your choices shape the home’s personality and boost comfort, inviting light and energy into each room with purpose.
Start small and let experimentation guide you; the only real rule is expressing your style in a way that makes the mirror, and the room, feel like yours every day.
Frequently Asked Questions
- What wood type is best for beginners making diy mirror frames?
Pine is lightweight, affordable, and sands smoothly, making it ideal for first attempts. It takes paint or stain well and cuts easily with a basic saw, so you’ll avoid frustration as you learn. - How do I safely attach a heavy framed mirror to drywall?
Use wall anchors rated for your mirror’s weight, spaced evenly at the top corners. If possible, mount into wall studs. Double-check level before tightening fasteners, and hang only after adhesives have fully cured. - Can I reframe an existing mounted mirror in the bathroom?
Yes. Use construction adhesive or heavy-duty mounting tape to attach thin frame pieces directly onto the mirror’s glass perimeter. Mask with painter’s tape to avoid misalignment, and avoid water-based glues where steam collects. - What’s a quick way to remove a damaged frame?
Score old glue beads with a utility knife, then gently pry loose fragments using a putty knife. Wear gloves to prevent glass cuts. Clean remaining residue before installing a new frame for best adhesion. - Do mirrored walls benefit from individual frames?
Yes, framing each section helps break up large expanses, adding architectural rhythm and visual clarity. Try slim moldings in slightly contrasting finishes for balance instead of bulkiness.

You may also like

How to Refinance a Loan and Lower Your Monthly Payments
Find out how to refinance a loan effectively, reduce your monthly payments, and manage your debt with smarter financial planning.
Keep Reading