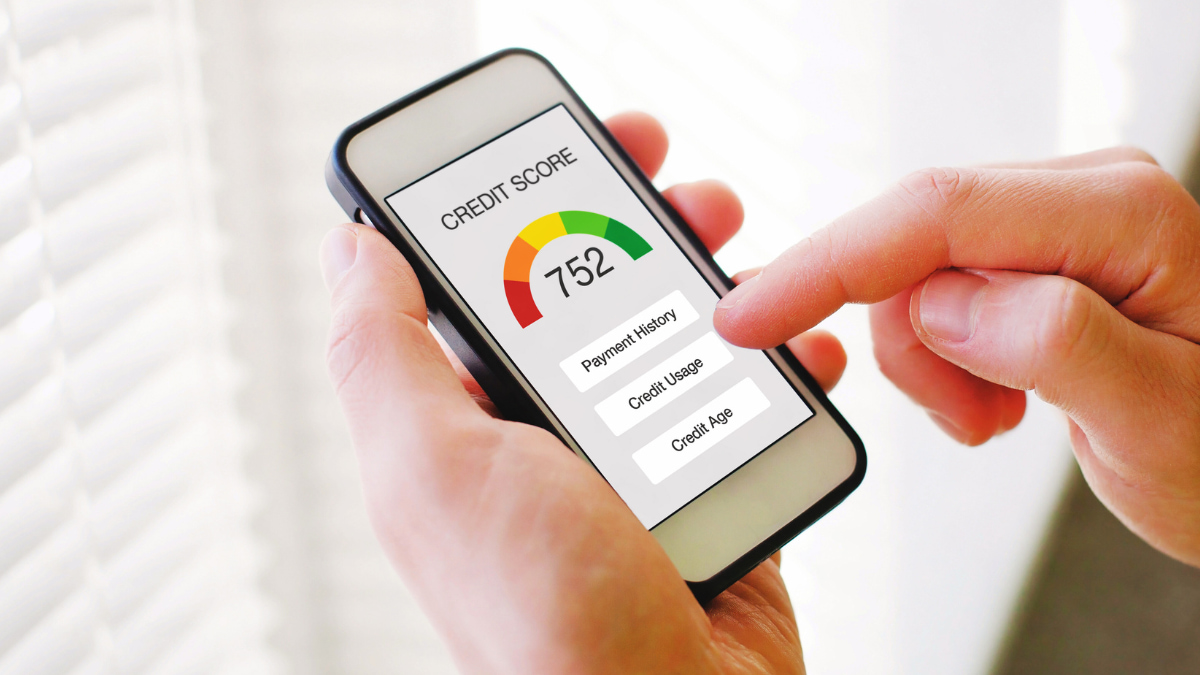
Build Your Own DIY Coffee Table: A Friendly, Step-by-Step Guide

Create your ideal diy coffee table from scratch with this friendly, step-by-step guide. Discover practical design, material choices, assembly, and maintenance tips for a one-of-a-kind result.

Imagine sitting in your living room and glancing at a coffee table you made with your own hands. That feeling is unmatched and deeply satisfying, especially when your living space truly feels unique.

Learning practical skills pays dividends, and building furniture like a diy coffee table ties creativity with utility. Few projects connect you to your space as directly as constructing your own home centerpiece, all while giving you lasting value.

This guide shares a practical, approachable way to create a coffee table from scratch. We’ll break down each step, suggest tips along the way, and give you confidence to start building today.

Choosing Your Materials and Tools Sets the Project’s Foundation

All successful diy coffee table projects start with clear decisions about materials and preparation. Identifying the right supplies early makes your process smoother from start to finish.

Gather all the essential tools and wood before you begin. This prevents project stalls—a simple planning rule that keeps your momentum strong throughout the build.

Deciding on Wood Type and Budget

Pine is affordable and easy to work with, making it a beginner’s favorite. Many say, “Let’s go with pine—if we mess up, replacing a board won’t break the bank.”

Opting for oak or maple adds longevity and a richer appearance, but costs more and is harder to cut and sand. Your choice here influences both finish and durability, so balance cost against desired look.

An easy comparison: If you want a rustic feel, go pine and keep extra boards on-hand. For upscale elegance, choose oak, but double-check your measurements before every cut to reduce waste.

Essential Tools: What You Need Before You Start

Lay out everything first—measuring tape, saw, sander, and screw gun. It’s much like having all your ingredients before cooking, ensuring the process is smooth and frustration-free.

Check that all your saw blades are sharp and your tape measure is easy to read. Mark your checklist on a simple notepad, so you don’t have to retrace your steps for missing items mid-project.

Enlist clamps and angle squares, so your joints fit neatly. Just like stacking books neatly in a shelf, squaring your cuts and joints early prevents headaches late in the project.

Material Cost (per 8ft board) Workability Best Use Case Takeaway
Pine $10 Easy Rustic/Beginner Start here for first diy coffee table.
Oak $25 Moderate Classic/Heavy Use Great for long-term projects.
Maple $30 Moderate Modern/High-Traffic Adds a modern look, durable.
Plywood $18 Easy Budget/Casual Light and versatile Top choice for budget builds.
Reclaimed Wood Varies Variable Eco-Friendly/Character Source carefully and prep surfaces well.

Designing the Table: Translating Inspiration Into Plans With Precision

Turning design ideas into actionable plans helps you move from photos to a functional layout. This is where sketches and measurements matter.

Measure your space first. “Let’s keep it under 48 inches long so it’s proportional to the sofa,” someone might say while planning a diy coffee table.

Building a Working Sketch: Step-by-Step

Draw a simple rectangle on graph paper. Mark where your legs will sit and estimate dimensions for the tabletop and height. Use arrows to indicate length and width—just like mapping out garden rows.

Decide if you want a shelf underneath—add another rectangle to your sketch and check that your final height fits your seating area. Layout translates concepts into a material list, keeping waste low.

  • Choose tabletop dimensions based on couch size—keeps room feeling balanced.
  • Set height to match seat level for easy reach—usually around 17 to 19 inches.
  • Add shelf space for books by marking extra supports—plan ahead for storage.
  • Pick straight or tapered legs—sketch side views for style clarity.
  • Account for tabletop edges and overhang—shows you where to sand smooth later.

Even pencil sketches help you visualize and lock in sizes. It’s easier to tweak a line on paper than recut a finished board, so take your time here.

Listing Materials and Calculating Quantities

Write a simple table with required boards and their lengths. Double-check that you haven’t forgotten supporting pieces like beams underneath. For a typical diy coffee table, you’ll need: four legs, one top, and bracing or shelf pieces.

List screws, glue, and protective finish on your shopping list. Check off each item at the store, and round up extra fasteners for test fits. This habit prevents last-minute dashes for missing parts.

  • Buy spare sandpaper in varying grits—prevents a rough finish.
  • Grab wood glue that dries clear for invisible joints.
  • Choose polyurethane for a sturdy, wipeable surface—ideal for busy spaces.
  • Select screws 1.5 times your board’s thickness—they hold everything tight.
  • Test stain color on a scrap first—ensures the final look matches your vision.

Detailing this list makes the actual shopping and cutting process feel practically effortless, since you’re never left wondering what’s missing or needed next.

Prepping Lumber: Measuring, Marking, and Creating Safe Work Areas

Careful lumber prep keeps your project clean and accurate. Every diy coffee table requires straight, splinter-free boards to create smooth lines and tight joints that last.

Begin by setting up a dedicated workspace — like a garage, patio, or even a well-tarped corner room. Good lighting and a sturdy workbench keep your cuts both safe and precise.

Precision Marking and Measuring

Use a carpenter’s pencil and square to mark all cuts clearly. Double-check each mark against your plans before saw meets wood. “Cut once, measure twice,” as the saying goes, proves priceless in avoiding costly mistakes.

Keep a small scrap board handy. Test your saw’s blade depth on it before cutting your main boards. This step assures your cuts will be clean and even.

Working in pairs, if possible, ensures boards don’t slip while measuring. If solo, use clamps to hold everything steady. Safe working habits pay off with crisp results and fewer re-dos.

Sanding for Smoothness and Safety

Smooth every edge and face with 120-grit sandpaper, then repeat with 220-grit for a silky finish. Wear a dust mask as you go. Say, “Let’s sand the tabletop until it feels like glass—run your hand over it before moving on.”

Round over sharp corners slightly, making them less vulnerable to chips. Spend extra time on the tabletop since it gets daily use and attention. A well-sanded surface saves time during finishing and feels better in daily life.

Vacuum or brush off dust between grit changes. This ensures old debris doesn’t scratch the wood. Clean boards absorb stain evenly and showcase the natural grain of your diy coffee table project.

Assembly: Step-by-Step Tabletop and Leg Joinery

Following a logical assembly process creates a sturdy result. Each joint, screw, and dab of glue contributes to a coffee table that lasts for years and looks great in your living room.

Tackling the tabletop first gives you a smooth, complete base for joining legs. Assembling in this order avoids unsteady frames and makes final construction more manageable.

Assembling the Tabletop With Care

Lay your boards face-down, edge to edge, and tightly clamp them together. Use wood glue along the seams and reinforce with pocket screws driven at angles. This method echoes the process for crafting strong bookshelves or counters.

Tap boards together gently using a scrap block and mallet. Wipe glue squeeze-out promptly for neat seams. Let the tabletop dry flat overnight before handling, preventing warping or bowing later.

Once dry, clean up any rough joint edges with a sander or block plane. This tiny detail makes the difference between “homemade” and professional, especially with a diy coffee table centerpiece.

Legs and Fastener Rules

Attach legs to the underside, precisely in from each corner. Use brackets, pocket screws, or direct mounting plates, depending on design. Drill pilot holes to avoid splitting the wood—a step that secures strength and longevity.

Clamp each leg tightly while fastening to ensure a square fit. Inspect visually from the side to check for wobble. A friend can double-check alignment, letting you correct any tilt before screws go all the way in.

Add bracing pieces between legs if you want extra strength or plan for a lower shelf. Secure bracing with angled screws or dowels, keeping everything flush and sturdy for everyday use.

Finishing Touches: Sanding, Staining, and Sealing for Daily Living

The final surface treatment determines both the look and the durability of your handmade diy coffee table. Quality finishing ensures it’s easy to clean, pleasant to touch, and visually appealing from every angle.

Spend extra time wiping away dust and sanding surfaces perfectly smooth before you move to finishing. This step prevents rough patches and leads to better stain absorption.

Stain or Paint: Picking the Right Finish

Select a stain color that complements your existing furniture. Apply it with a soft rag, following the grain of the wood. A friend might suggest, “Let’s test this walnut stain under the table, just in case it’s too dark up top.”

Allow stain to penetrate for the recommended time, then wipe excess for an even tone. For paint, use a smooth, small roller for uniform coverage. Let each coat dry completely before adding more, and lightly sand between coats for smoothness.

Use painter’s tape to mask off sections, giving clean lines where the legs meet the top. It’s a simple tip, but it makes transitions sharp and tidy, especially if contrasting colors are used.

Sealing for Longevity

Brush or wipe on two to three coats of polyurethane, sanding lightly with 320-grit after every coat once dry. These layers protect against spills and scratches—ideal for a well-used family space.

Avoid heavy-handed application; thin, even coats prevent bubbles or streaks. Use a clean cloth to wipe down between sanding sessions, keeping the surface flawless and clear of debris.

Final touches like felt pads beneath the feet prevent floor scratches and sliding. Lift the table gently into place after curing, showcasing your work with pride in your living area.

Maintaining Your DIY Coffee Table: Daily Care and Repairs That Last

Peerless furniture requires routine attention. With daily care and periodic touch-ups, your diy coffee table can serve as a home centerpiece for years without losing its appeal or stability.

Adopt the habit of cleaning with a soft, slightly damp cloth rather than harsh chemicals. This habit keeps the finish clear and the grain vibrant, serving both beauty and function.

Action Steps for Preventing Wear and Tear

Add coasters and trivets as standard practice. Each morning, place your mug on a coaster, not the wood. This simple act prevents water rings and heat marks, preserving your handiwork.

Every month, check for wobbles or loose screws. If there’s a slight shake, tighten hardware promptly before it becomes a larger problem. A friend might say, “Give the table a shimmy—better to fix loose legs now than later.”

Periodically, reapply a coat of furniture wax or polish. Rub in small circles with a clean cloth, bringing back the luster and helping repel sticky fingerprints or dust.

Repair and Refresh: Easy Fixes for Life’s Bumps

If a scratch appears, use a furniture touch-up marker in a matching shade. Color in the scratch, blend with a finger, and buff gently with a cloth. It’s an instant fix that covers up most minor mishaps without a trace.

For bigger dings, fill with wood filler, sand smooth, and reapply stain as needed. Repairs like these make your diy coffee table look new year after year, no matter what life brings.

If you want to refresh the entire finish every few years, lightly sand the whole surface and apply a fresh coat of polyurethane. This routine extends the life and shine of the piece, ensuring it always looks showcase-ready.

Frequently Asked Questions

Can I build a diy coffee table with just hand tools?
Absolutely. While power tools make the process faster, you can use a handsaw, hammer, and screwdriver for all major steps. Just plan extra time for cutting and sanding, and focus on measuring carefully for good results.

What’s the most beginner-friendly wood to use?
Pine is easy to cut, inexpensive, and widely available, making it ideal for first-time builders. It’s forgiving, and mistakes are easily fixed. Pre-sanded boards save even more work and help new builders achieve smooth surfaces quickly.

How do I keep my table from wobbling?
Make sure all cuts are straight and legs are attached at right angles. Tighten screws fully, and place the table on a flat surface to check alignment. Add corner braces for extra strength if needed; they’re easy to install and very effective.

How long does a diy coffee table typically take to build?
Expect two afternoons for cutting, assembly, and finishing, plus overnight drying. Having all tools and materials ready shortens the timeline. Those new to woodworking should go slow—patience yields a better, custom-finished product.

Can I customize the size or add storage features?
Absolutely. Adjust dimensions to fit your space or add shelves and drawers for storage. Use your plans as a base, and tweak measurements as needed. Adding a shelf or drawer creates extra utility and personalizes the outcome for your needs.

© 2025 Portal do Lucro. All rights reserved